Tutorial 7 - Managing Policy Violations
Your DejaCode administrator has configured policy rules for your Dataspace. This tutorial walks you through discovering policy violations on a product, understanding what they mean, drilling into the affected packages, and resolving them.
See also
Refer to Policy Rules Engine for a complete description of all available rules and their violation lifecycle. If you are an administrator and need to enable or configure rules, refer to How To 6 - Configure Policy Rules.
Sign into DejaCode.
1. Open the Compliance Dashboard
From the main menu, navigate to the Compliance Dashboard.
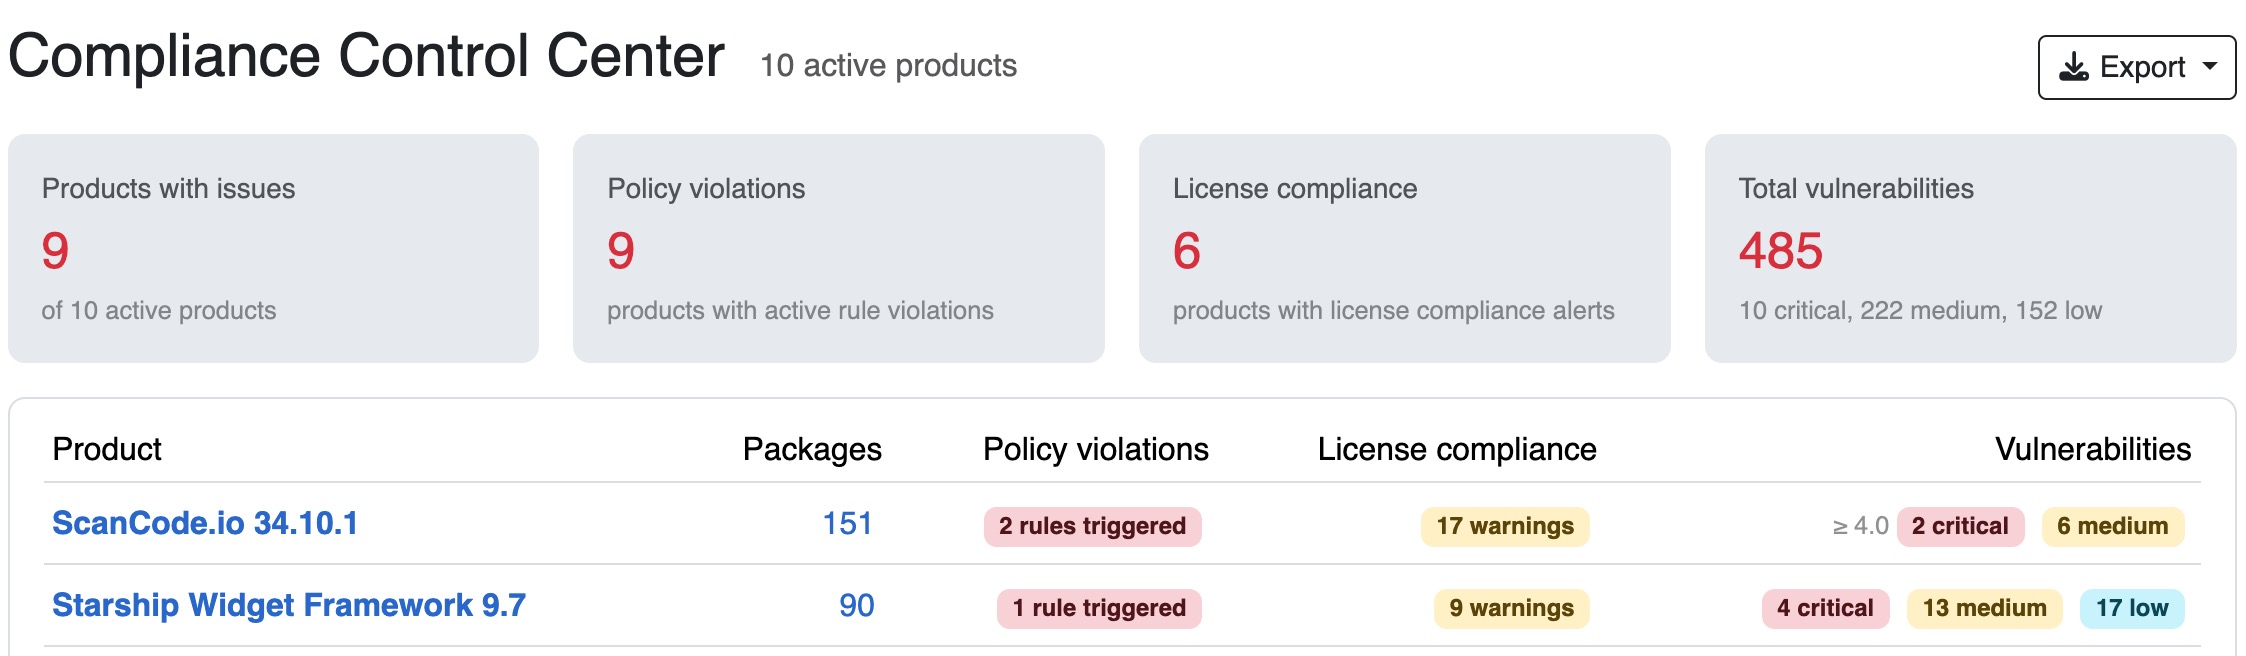
The dashboard lists all your products with their compliance metrics. Look at the Policy violations column to see which products have active violations.
Click the policy violations count on a product row to open its Compliance tab directly.
2. Review Policy Violations
The Policy violations panel shows the active violations for the product.
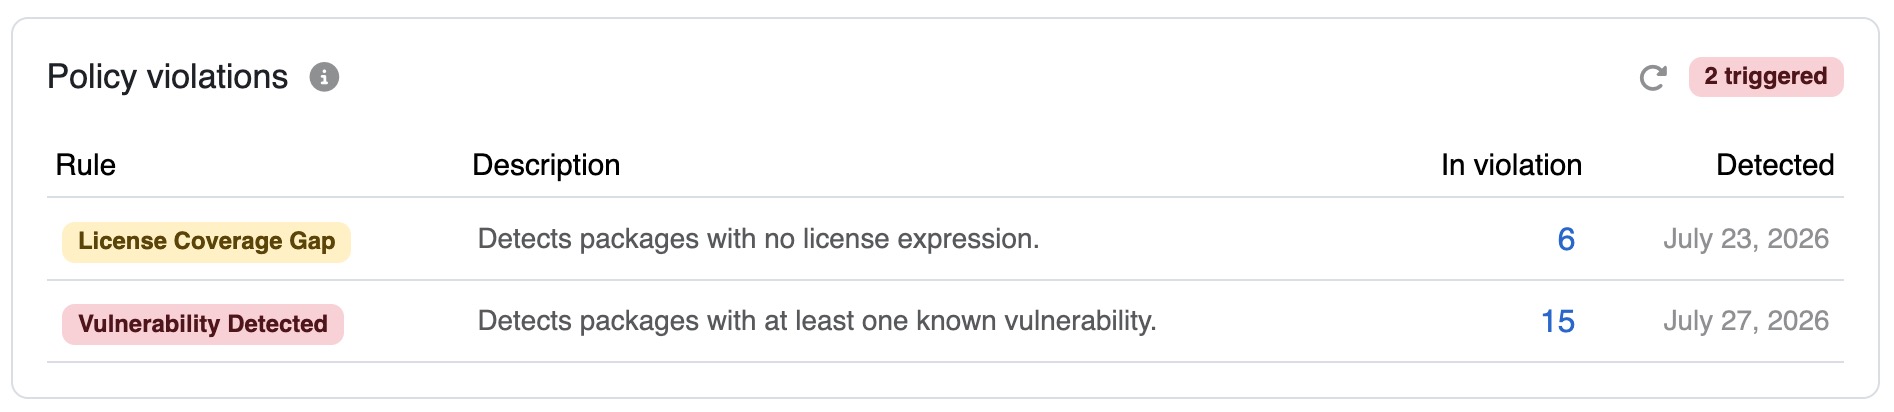
For each triggered rule, the table shows:
The rule label and severity, color-coded as red (error) or yellow (warning).
A short description of what the rule detects.
The number of packages in violation.
The date the violation was first detected.
The badge in the panel header shows the total number of triggered rules. Its color reflects the highest severity: red if at least one error rule is triggered, yellow if only warning rules are triggered.
Tip
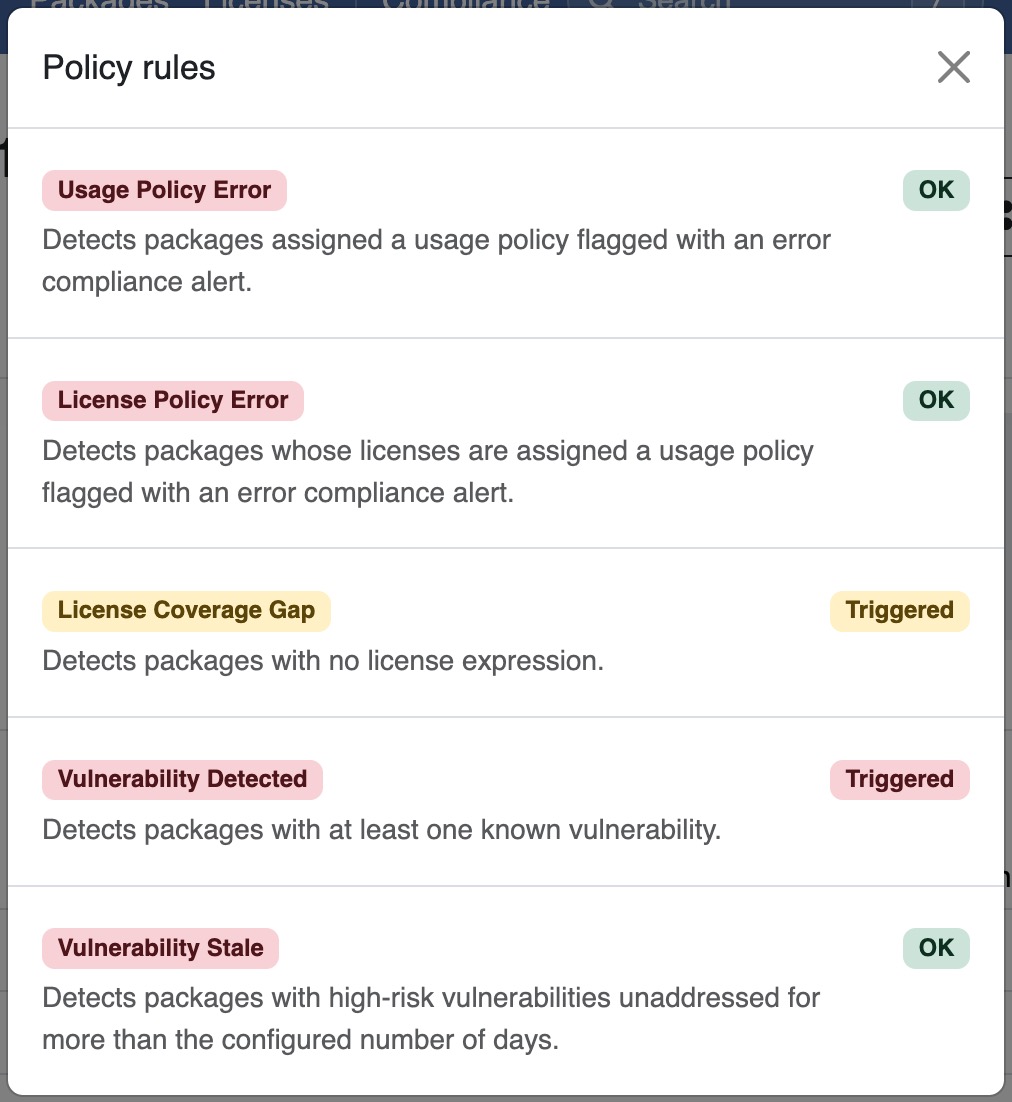
Click the info icon next to the panel title to open a modal listing all active rules with their current status: Triggered or OK. This gives you a full picture of your overall compliance status at a glance.
3. Drill Into Affected Packages
In the Policy violations table, click the count in the In violation column for the rule you want to investigate.
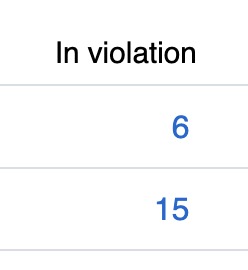
The Inventory tab opens pre-filtered to show only the packages that triggered that rule.
Review the packages and decide what action to take: update a license expression, assign a usage policy, or triage a vulnerability.
4. Resolve a Violation
Violations are resolved automatically when the underlying condition is corrected. The following example shows how to resolve a Vulnerability Unresolved violation by completing a vulnerability analysis.
From the filtered inventory, click a package to open its detail page.
Navigate to the Vulnerabilities tab.
For each vulnerability, click Edit analysis and set the analysis state to a terminal value such as Resolved or Not affected.
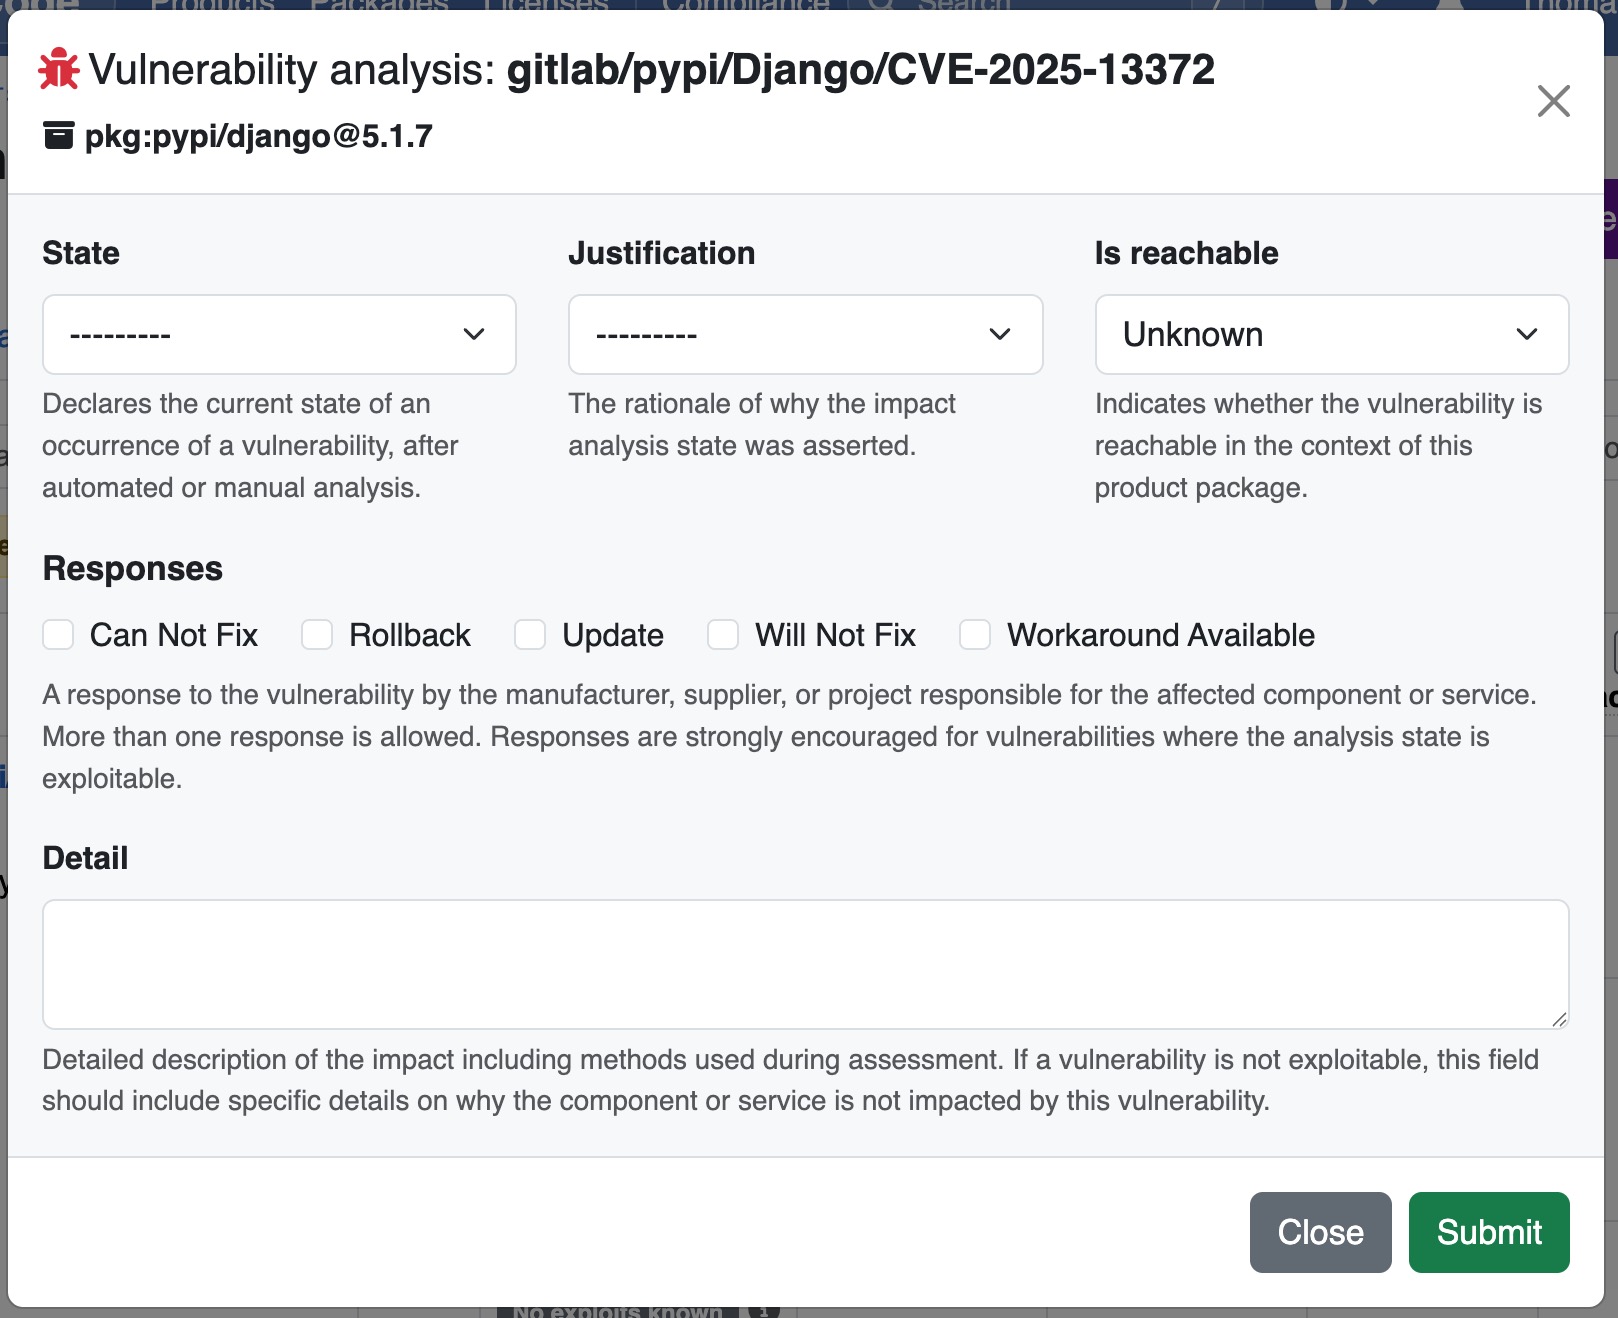
See also
Refer to How To 4 - Product Vulnerability Analysis for a detailed guide on vulnerability analysis.
Once all vulnerabilities on a package have a terminal analysis, that package is no longer counted as a violation for the Vulnerability Unresolved rule.
5. Re-evaluate and Confirm
After correcting the underlying condition, trigger a manual re-evaluation to update the violation count immediately rather than waiting for the next automatic run.
Return to the Compliance tab of the product.
Click the re-evaluate button next to the Policy violations panel header.
The panel refreshes with updated violation counts. Rules whose conditions are no longer met are cleared from the table.